Know when to take your sails to an expert and how to do simple repairs yourself

It’s ironic that many sailboat owners will go to great lengths to properly winterize their auxiliary engine but do nothing more to the real engine of their boat-the sails-short of taking them off the boat to be stored in the basement. Sails are durable and can last a long time, but a bit of care throughout the season, and certainly at the end of the season, or a least annually for year-round sailors, can extend their useful life.
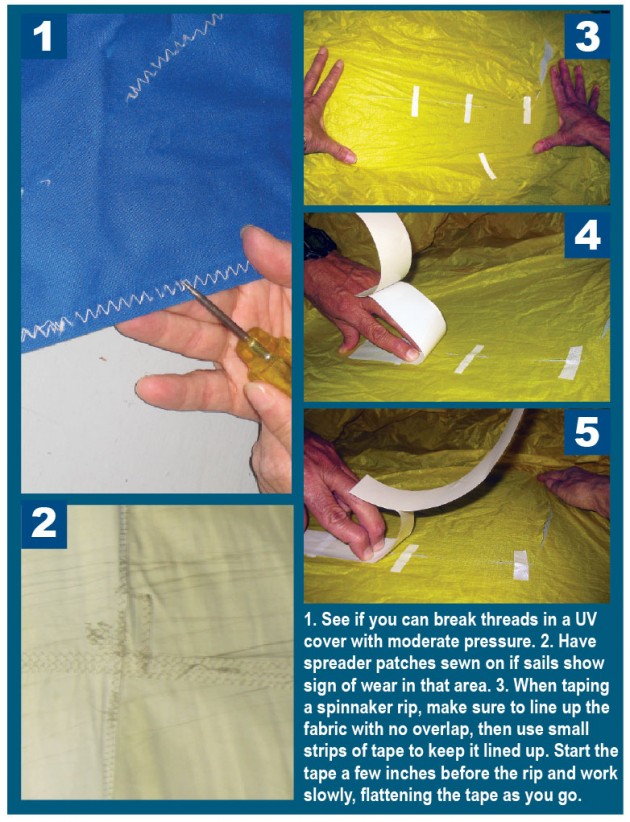
Before putting the sails away for the year you should spread them out and carefully look at each seam, batten pocket and corner reinforcement for broken stitching. The stitching in ultraviolet protected covers is particularly vulnerable and should be thoroughly inspected for wear and tested for weakness. In the loft we use a pick to see if we can break the thread with moderate pressure and if we can in numerous areas, we recommend that the entire UV cover be resewn (photo 1).
Sunbrella ultraviolet covers wear very well but the lighter-weight Dacron covers wear out after a number of seasons and the cover will need to be replaced. The test is to try to rip small tears by hand. If it tears like paper it’s time to bring the sail to your sailmaker to see if it can be repaired, or if it must be replaced. Of course, if there is a tear in the sail or cover you’ll want to get it fixed properly so you can sail with confidence next year.
Next, look at the luff tapes of genoas for tears along the cord that goes into the foil. On jibs and genoas that have hanks, look at the grommets to be certain they’re not ripping out of the luff tape. Mains should have all the slugs, slides and attachment shackles or webbing inspected. Missing slides or shackles need to be replaced and loose or worn webbing replaced or resewn.
Also, check the area of the sail that rubs on the spreaders, pulpits and stanchions for excessive wear. These areas are particularly prone to wear and damage despite whatever protection you might have in place. If there are noticeable marks on the sail you should have spreader reinforcement patches sewn on. This is important for all sails but absolutely necessary for laminated sails (photo 2).
If you want to clean the sails check with your sailmaker for the proper procedure for the type of material you have. Cleaning will generally do a good job of removing surface dirt and light stains but deeply imbedded stains and mildew are most likely permanent. Keep in mind that many chemicals, especially bleach, will weaken the sailcloth and dramatically reduce the lifespan of the sail.
Sometimes you may need to do small sail repairs yourself. You may not want to part with your sail even for a few days and choose to make repairs to get through the season before sending your sail off to the sailmaker for repairs. Onboard repairs are required during extended voyages or races.
If you need to repair a sail yourself there are a few things you’ll need: a clean, dry sail, a flat surface and patience. If you’re sailing in fresh water you can dry the sail with paper towel or a micro-fiber towel. If you’re in salt water rinse the sail well first. Work on small sections of the sail trying to keep the tension on each side of the tear equal and the edges lined up. Enlisting a couple extra hands can be useful. Using small pieces of tape “stitch'” the rip together lining up corners or jagged spots of the tear (photo 3). Once you have the basic tear pieced together, use longer strips of repair tape on both sides of the sail to cover the tear.
Low-load sails like spinnakers or areas of the sail in the body of the sail shouldn’t require much tape for an effective repair. Use light sail repair tape for spinnakers, making sure not to create any addition puckers in the sail. A cutting board or floorboard can be helpful to get a flat surface to work on. Match up the tear so that it lays flat, not overlapping, then start your tape a few inches before the tear (photo 4). Flatten the tape as you peel back off the backing (photo 5). For smaller tears a single layer of tape should be adequate, but for larger repairs you’ll want to use matching pieces of tape on each side.
If you have a small wear hole from a pulpit or stanchion, or a small hole in a batten pocket then a single layer of tape should be fine. Higher load areas along the leech of a mainsail or genoa will require a few layers spanning several inches on each side of the tear. Most sail repair tapes have very good adhesion but you might consider hand sewing through the repair tape on each side of the tear if it is near the leech of your main or genoa. These kind of tears are a seam that has opened up, or a hole caused by the spreader punching through the sail.
For most tears it’s a good idea to have a sailmaker do a more lasting repair on the sail at the end of the season.
Tom Pease is a sailmaker for North Sails.
For sail care during the season you’ll want to have supplies on hand for emergency or incidental repairs. Just how extensive your sail repair kit is will probably depend on the length of your passage and how remote an area you will be in. But the bottom line is if your sail is torn and cannot be used you are not going very far, very fast.
For daysailing and coastal cruising in areas where supplies and support are easy to find you still want to be able to take care of minor repairs.

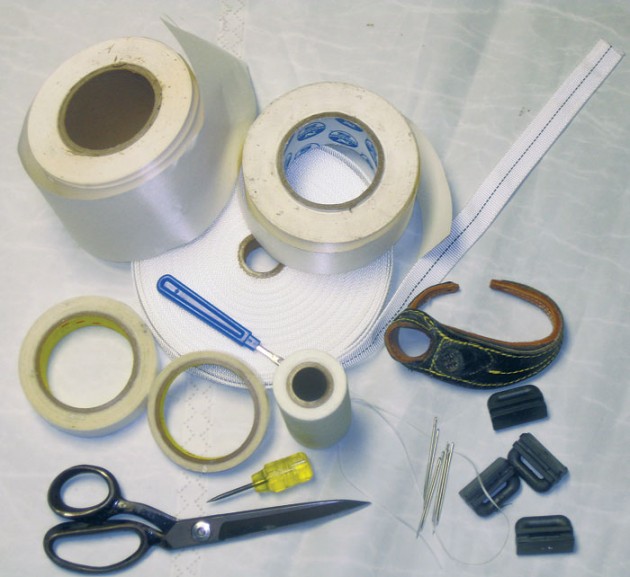
The following is a list of basic items you should consider having onboard at increasing levels of self support. Starting sail repair kits are available from many boating supply retailers and sailmakers but will likely need to be supplemented.
Sail repair basics
” Shears
” Palm
” Assorted hand sewing needles
” Pre-waxed hand sewing thread
” Rip-stop tape for spinnaker/gennaker repairs
” 4-ounce Dacron PSA tape for minor main and genoa repairs
” Spare battens or length of stock that can be cut down
” Slugs/slides to match hardware on mainsail
” Shackles or half-inch Dacron webbing to attach slugs/slides to main
” 1-inch Dacron webbing
” Telltales
” Seam ripper
” Razor knife
For longer distance cruising or sailing in remote areas you should consider adding materials for more extensive repairs. Necessary repairs to keep you going could be as simple, but time consuming, as hand sewing an area of the UV cover back on the leech of a genoa, to patching a major tear across the sail.
Long-distance add-ons
” Dacron seam thread
” A few yards of 24-inch to 54-inch width 4-ounce Dacron PSA
” Material suitable to repairing a hole or tear in a high load area of the sail (consult your sailmaker)
” Stainless steel round rings, 1-1/4-inch to 1-1/2-inch, depending on the size of your boat
” Hot knife/soldering gun (butane)
” Double-sided seam tape
I also recommend having an awl, mallet and vinyl cutting pad so you can pre-punch holes in heavily reinforced areas of the sail. It’s a lot easier to pass a needle through a hole than trying to drive it through the webbing and clew patch. –T.P.
source:sailing magazine


